Perfectly Cooked Thin Sliced Chicken Breast (Air Fryer Recipe)

On Sep 25, 2023, Updated Oct 31, 2026
This post may contain affiliate links. Please read our disclosure policy.
Juicy and tender with savory garlic-paprika seasoning, these thin chicken breasts in the air fryer are one of my favorite ways to get protein on the table when I haven’t planned much for dinner. A little oil and everyday seasonings are all you need, with no breading or marinating and just 7-10 minutes of cooking time. Whether you’re serving them with a side, adding them to a salad, or tucking them into a sandwich, my tips and tricks help those quick-cooking pieces stay moist.

Table of Contents
How I Keep These Thin Chicken Breasts Juicy
Thin chicken breasts cook quickly, which is exactly why I like them, but a couple of extra minutes can take them from tender and juicy to tough and dry. Since there’s no marinade or breading here, paying close attention to when the chicken is ready really matters.
Instead of going by cooking time alone, I start checking each piece with a meat thermometer around the six-minute mark. As soon as the thickest part reaches 165°F, I take it out of the air fryer. Then I let the chicken rest before slicing so more of those juices stay in the meat instead of running onto the cutting board.
Taking the chicken out at the right temperature does most of the work, but these little details help, too:
- Inserting the thermometer sideways. With chicken this thin, it’s easy to push straight through from the top and get a misleading reading. Go in from the side so the tip reaches the center of the thickest part.
- Even out thicker spots. If one end is noticeably thicker, give just that spot a few gentle taps with a meat mallet or rolling pin. You don’t want the thin end drying out while the thicker end catches up.
- Giving the chicken some room. I keep the pieces in a single layer without overlapping so hot air can reach each one. My air fryer fits a full batch, but if yours doesn’t, cook in batches. I’d rather cook another round than squeeze everything in and end up with uneven results.
- Choosing juiciness over extra browning. A little browning is great, but once the chicken reaches 165°F, take it out. A darker outside isn’t worth drying out the center.
Ingredient Notes
I usually buy the chicken already thinly sliced to save a step, and the rest comes from my pantry. Here’s what to look for and what you can swap:

For full recipe instructions and complete list of ingredients, scroll down to the recipe card at the bottom of this page.
- Thin-sliced chicken breasts: Look for boneless, skinless breasts labeled “thin-sliced” or “chicken cutlets.” You can also use regular chicken breasts and slice them in half horizontally, keeping your knife parallel to the cutting board.
- Seasonings: Garlic powder, onion powder, paprika, salt, and black pepper give the chicken its savory flavor without needing a marinade. Italian seasoning is an easy addition if you want some herbs, or use your favorite chicken seasoning blend. If your seasoning blend already contains salt, reduce the added salt.
How to Cook Thin Sliced Chicken Breasts in the Air Fryer
Thin chicken breasts take about 7-10 minutes at 400°F, depending on their thickness. Very thin pieces may be ready sooner, so start checking around six minutes. Here’s how I prep and cook them:

- Prep the chicken. Preheat the air fryer to 400°F and pat the thin-sliced chicken breasts dry with paper towels.
- Oil and season. Lightly coat both sides with olive oil, then season evenly with garlic powder, onion powder, paprika, salt, and pepper.

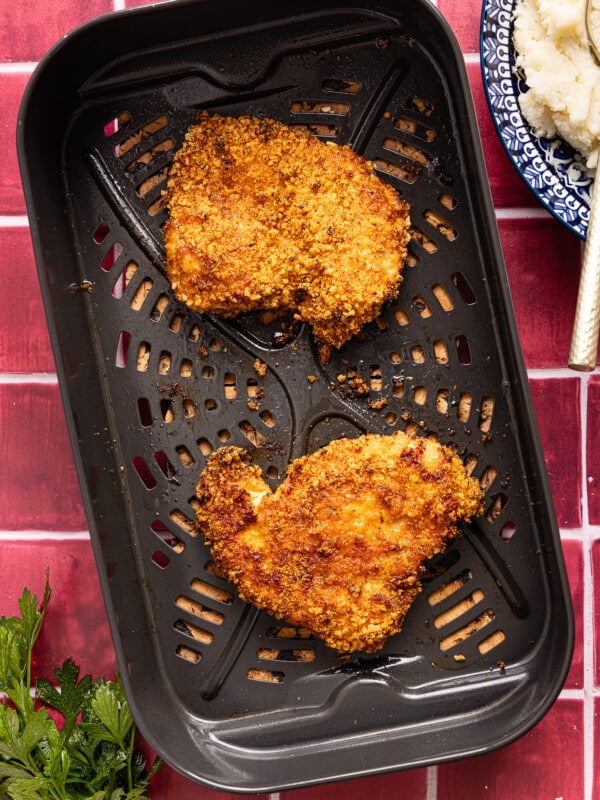
- Air fry. Arrange the chicken in a single layer and cook for 7-10 minutes. I don’t find flipping necessary, but you can flip halfway through if you prefer. Note: These cutlets were about ½ inch thick. Cook time varies depending on the thickness.
- Check and rest. Remove the chicken when the thickest part reaches 165°F. Let it rest for a few minutes before slicing and serving.
How Long to Air Fry Thin Chicken Breast
Air fry for 7–10 minutes at 400°F, start checking around 6, thickness matters more than the clock, remove at 165°F.

Easy Sides For a Complete Meal
The chicken takes care of the protein, so I like to add some fiber and starch to make it a meal that holds me over. Here are a few easy sides to round out the meal:
- Vegetables: Steam a bag of broccoli or mixed veggies in the microwave, then toss with butter or olive oil and your favorite seasoning for a quick side. If you have a little more time, my Parmesan carrot sticks are great with these air fryer chicken breasts. Start them first so they’re ready around the same time.
- Salads: A bagged salad is an easy choice here. If you have cucumber, canned chickpeas, and tomatoes, my cucumber chickpea salad takes about 10 minutes. Start chopping while the air fryer preheats.
- Potatoes or rice: Microwave a potato or warm a pouch of brown rice for a quick side. If you have more time, my cottage cheese mashed potatoes go well with the garlic-paprika chicken. Start either one before prepping the chicken so everything’s ready around the same time.
Meal Prep and Storage
Thin pieces can dry out quickly when reheated, too, so leftovers need a little care. Here’s how to keep them for another meal:
- Refrigerate: Keep cooked chicken in an airtight container in the fridge for 3-4 days.
- Freeze: Portion cooled chicken into freezer-safe bags or containers for up to three months. Thaw overnight in the fridge before reheating.
- Reheat: Add a small splash of water or broth, loosely cover, and microwave in short intervals until the center reaches 165°F. Check between intervals so you don’t heat it longer than needed.
More Easy Chicken Recipes


If you’ve made and loved these Thin-Sliced Air Fryer Chicken Breasts or any other recipe on my blog, please leave a 🌟 star rating and comments below!

Perfectly Cooked Thin Sliced Chicken Breast (Air Fryer Recipe)
Equipment
- Air fryer
Ingredients
- 1 lb chicken breast, thinly sliced
- 1 tbsp olive oil
- 1 tsp garlic powder
- 1/2 tsp onion powder
- 1/2 tsp paprika
- 1/4 tsp salt
- 1/4 tsp pepper
Instructions
- Preheat your air fryer to 400 and prep your chicken by patting each breast dry with a paper towel.
- Then, coat both sides of each breast with olive oil.
- Next, season both sides with all seasonings evenly.
- Arrange your chicken breasts in the air fryer in one layer (if you have several, you may need to work in batches depending on your air fryer size).
- Air fry the chicken breast at 400 degrees for 7-10 minutes. Cook time will depend on the thickness of your chicken breast, so start checking on them around 6 minutes. When they're done, they should be cooked to 165 degrees (check with a meat thermometer like this one)
- Serve on top of a salad, in a sandwich, or with potatoes or rice and a veggie!
Notes
- Thickness matters. Thin-sliced chicken can vary quite a bit, so start checking the internal temperature around 6 minutes. Very thin pieces may finish before the full 7–10 minute range.
- Check temperature from the side. Insert an instant-read thermometer sideways into the thickest part so the tip stays in the center of the meat rather than passing straight through.
- Don’t overcrowd the basket. Arrange the chicken in a single layer without overlapping so the hot air can circulate evenly.
- Stop at 165°F. Remove each piece as soon as the thickest part reaches 165°F rather than cooking longer for extra browning.
- Storage: Refrigerate leftovers in an airtight container for 3–4 days. Reheat gently with a splash of water or broth to help keep the chicken from drying out.
Nutrition
Nutrition information is automatically calculated and should only be used as an estimate.











Hi! Do you flip the chicken midway?
I don’t find that you have to but you definitely can 🙂
Je viens de faire cuire un poulet SUPER bon
même mon mari l a aimé lui qui dédeste le poulet. C est le meilleur le plus juteux. Il est parfait ainsi que les assaisonement
I took 1 LG breast and cut it into 5 pieces about 3/4 -1″ thick seasoned it with montreol chicken seasoning and placed in my pre-heated air fryer for 6 minutes turning at 3 minutes….only one piece had to be cooked 2 minutes longer because of the way I cut it so, totally my fault! It turned out so flavorful and juicy! Definitely going to make again! Served it with garlic butter noodles! My husband kept saying how good it was!
So glad you enjoyed! Definitely one of my favorite ways to make chicken because it’s SO easy!